Off Ice Training with Straps – Part 1 of a 2 Part SeriesBy Susan Ellis, July 2009
|
We are what we repeatedly do. Excellence, then, is not an act, but a habit ~ Aristotle |
One of the keys to making technical improvements or changing bad habits is to slow things down to really FEEL what you need to feel off ice. By adding resistance to slow training you are recruiting more muscle fiber and training them in the proper neural pathways to create the exact motion you want on the ice.
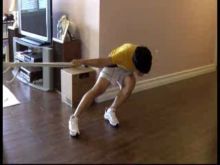
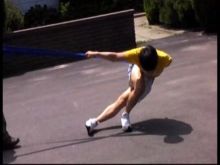
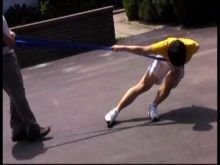
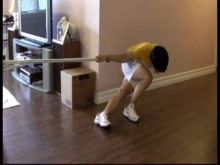 Right leg – Click image to watch video Right leg – Click image to watch video
Off ice it’s fairly easy to slow things down. Techni-cords are a proven method for both technical and strength and power training. (See Maximize Your Results with TECHNI-CORDS – June 2004, Specific Strength, Power, Endurance – Part 3 – Corners – July 2006.) The good thing with Techni-cords is that you can use them even when you don’t have a partner by simply attaching them to a railing, or hook in the wall. You can easily change the resistance as well as the speed of movement. They are also very useful in isolating certain parts of each movement that might need improvement, such is pressing through the right hip repeatedly.
|
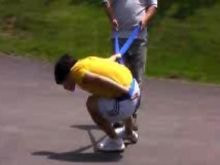 Click image to watch video
Technical precision is crucial to proper execution and it starts with the basic starting position. Notice how Chae’s hips are tucked nicely under him, chest is down, belly close to thigh but not actually touching the thigh, back rounded and relaxed, no rotation of shoulders or hips, knee forward past toes. It is absolutely critical to maintain this position throughout the entire drill. One of the biggest mistakes is for the hips to rise up and back during the push. Some skaters do this to take some pressure off the pushing leg (that’s cheating), some don’t even realize they are doing it. You must keep your lower back rounded so your hips stay under you to maintain pressure good pressure.
In the first photo above look at Chae’s basic position. Hips are tucked under, shoulders and hips square and level, left side is aligned on the left leg, right leg is fully extended, both feet pointed straight ahead. His right shoulder is almost over his left knee. (And yes, he should have eyes forward rather than looking at his feet.)
2nd photo: He maintains a low hip under position and actually brings the hips under even further while bringing his right knee up towards his left shoulder and maintains pressure under his whole foot, not just the heel or the ball, by pressing hard in to the ground. Through the abdominal muscles and in to the glute and leg muscles.
3rd photo: See how close he brings his knee under his chest! He can actually touch it with his chin. His whole thigh should remain there as he extends with his left now. Notice how his right shoulder is pressing down and he is pressing in through his right hip. The right hip should actually come very slightly forward of the left hip to initiate the push but both hips then come forward equally. Bringing only the right hip forward will cause a rotation inward and bringing only the left hip will cause a rotation outward.
4th photo: He continues to push and fully extend the left before touching down with the right.
5th photo: When he is fully extended with the left and the right has touched down notice the angle on his right shin when it lands. It is leaned and doesn’t land straight up and down.
On the right push sequence, again notice Chae’s starting position. Hips are down and tucked under, shoulders and hips square and level, left leg is fully extended, both feet pointed straight ahead. His right shoulder is over his right knee and right shin and knee pointed toward sternum.
2nd photo: To start the push on the right he presses down with his right shoulder, through the abdominal muscles, in to the right hip and glute and then presses in with his right hip and glute. He then presses his right knee forward (while keeping his heel on the ground) and presses hard in to the ground from the abdominal muscles right in to the right glute and in to the leg. Notice how close to the ground his left knee passes! And it stays close to his left leg until the left knee passes the right.
3rd photo: Still pressing shoulder down, hip in while driving his left knee up under his chest.
4th photo: Holding his left thigh under his belly while he continues to extend and push hard in to the ground through his right side.
5th photo: Lands the right at the end of the left leg extension. Did you notice his upper body stayed in the same position throughout the movement?
So how often do you need to do either Techni-Cords and/or belts to create good habits? If you’re a younger skater maybe 3 times a week for 10 -15’ is good. For older skaters, especially if you don’t have ice, 4 – 6 times a week is needed for 20 -30’. Of course, it depends a bit on what other training you are doing but you can always fit some of this type of work in to your warm ups. Not only will you build technique, but you will also be building very specific strength as well.
Many thanks to Chae Young Lim of the Saint John Club for your excellent technical work and participating in this video!
Many thanks to Chae Young Lim of the Saint John Club for your excellent technical work and participating in this video!
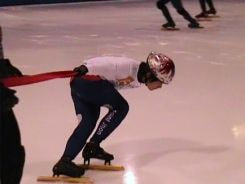
Next month – Working with Straps On ice

